Animated GIFs are useful for adding more narrative and dimension to images. You can make animated GIFs in Photoshop from video files, photos, and illustrated images.
There are two methods to create a GIF in Photoshop, and we’ll go over each of them in this step-by-step guide:
- Method 1: Make a GIF in Photoshop using pre-made images (photos or illustrations)
- Method 2: Make a GIF in Photoshop using a video file
Today I’ll be using Astropad Studio to use the full desktop version of Photoshop on my iPad. Let’s get started!
How to create an animated GIF in Photoshop using Video Timeline
If you want to practice making an animated GIF in Photoshop, the best way to start is to bring out the Timeline panel.
- In the top menu bar, go to Window, then select Timeline.
- In the Create Timeline option, select Create Video Timeline.
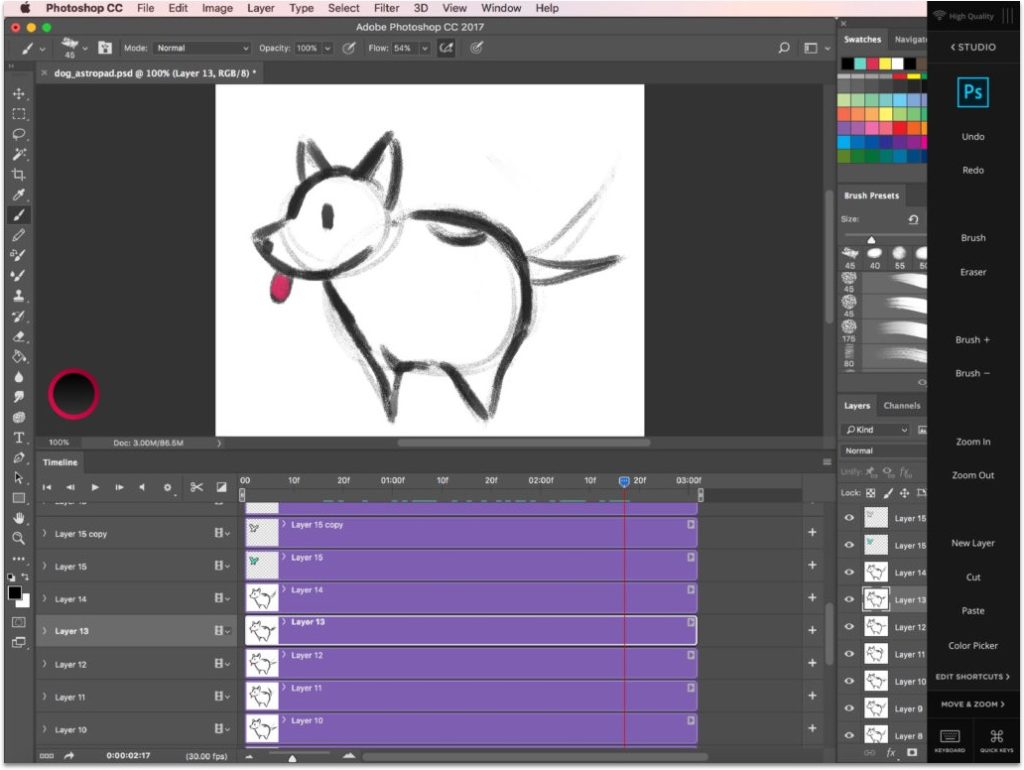
On the Video Timeline, Layers are organized as Tracks, and can always be rearranged.
The purple bars represent the time duration of each frame within the Track.

Adjust the frame rate of your Photoshop GIF
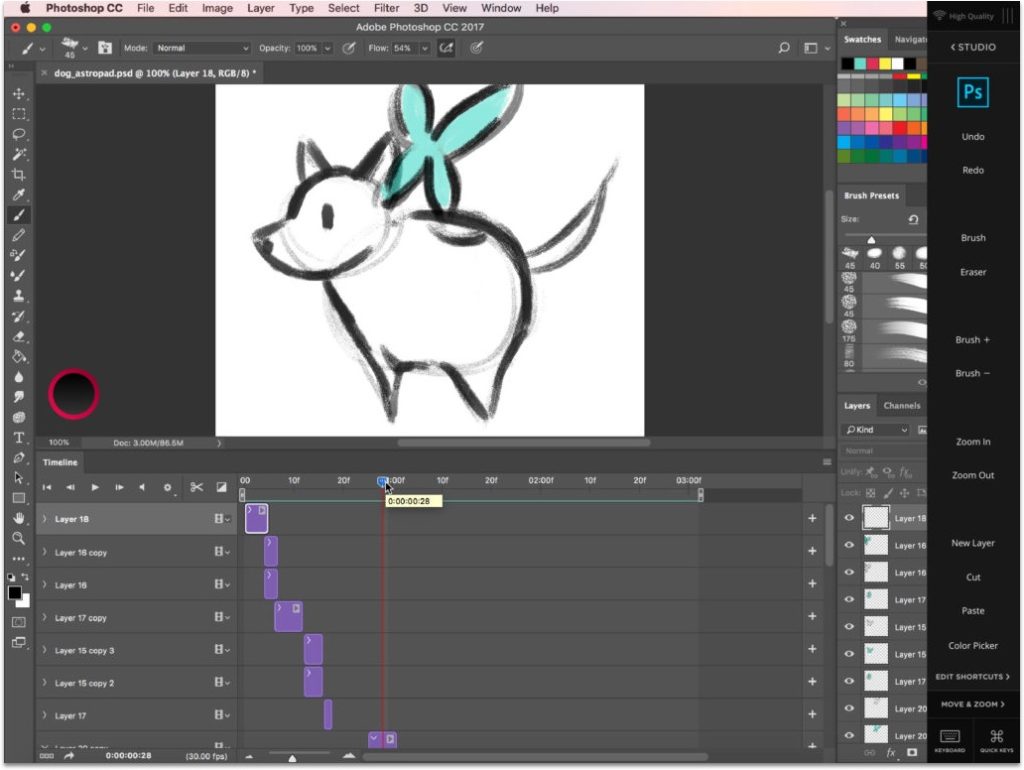
The duration of each frame can be lengthened, shortened, or moved to a different part of the Track. Adjust the endpoints by dragging the entire clip horizontally on the Timeline.
Press the play icon to play back your sequence. You can move the Playhead to a specific spot on the Timeline to start playback from that point.
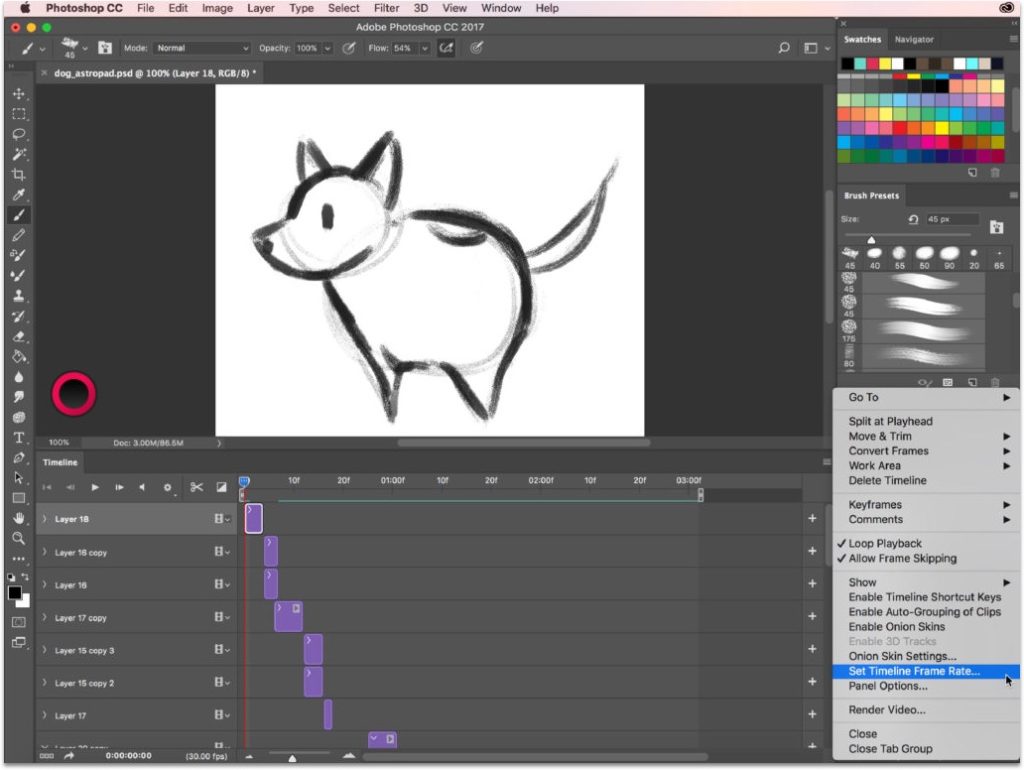
If playback feels too slow or fast when making an animated GIF in Photoshop, adjust your Timeline Frame Rate. This is accessible in the Timeline expandable menu (top right corner). Adjusting the Timeline Frame Rate will change how many frames per second (fps) your animated GIF file will go by.
👉 Default frames per second: When making an animated GIF, Photoshop is set to 30 fps by default. 30 fps may be good to start with, but depending on your project it may need to be adjusted.
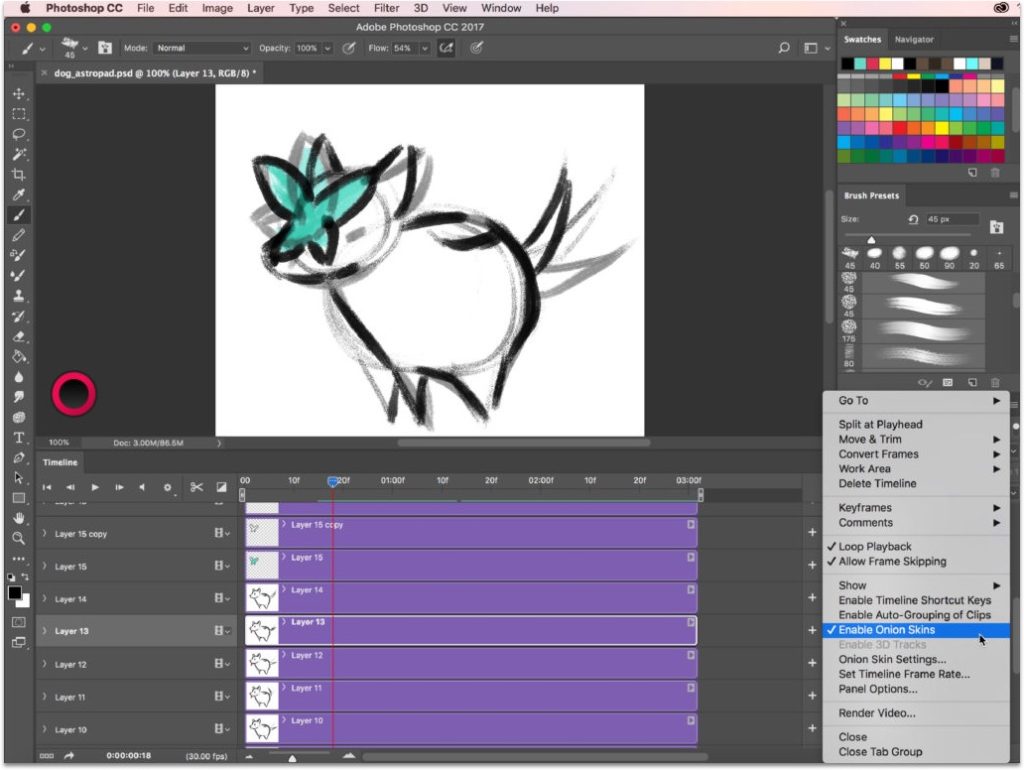
Enable Onion Skins to view multiple keyframes at once
To make an animated GIF in Photoshop with smooth transitions you’ll want to enable onion skins.
Onion-skinning lets you see multiple keyframes at once. This is done by underlaying the previous frame at lower opacity behind the selected frame in the sequence.
With onion skins, you’ll get a better idea if you need to add any in-between images to smooth out the transitions.
How to create a GIF in Photoshop using pre-made images and Frame Animation
To make an animated GIF in Photoshop with images you already have is a slightly different process.
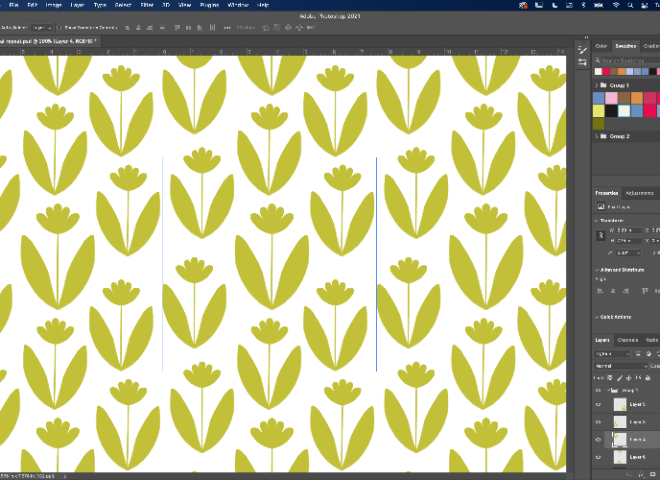
To get started, go to File > Scripts > Load Files into Stack. This method of making a GIF loads all of the individual images onto one canvas as individual layers. Each layer represents a frame.
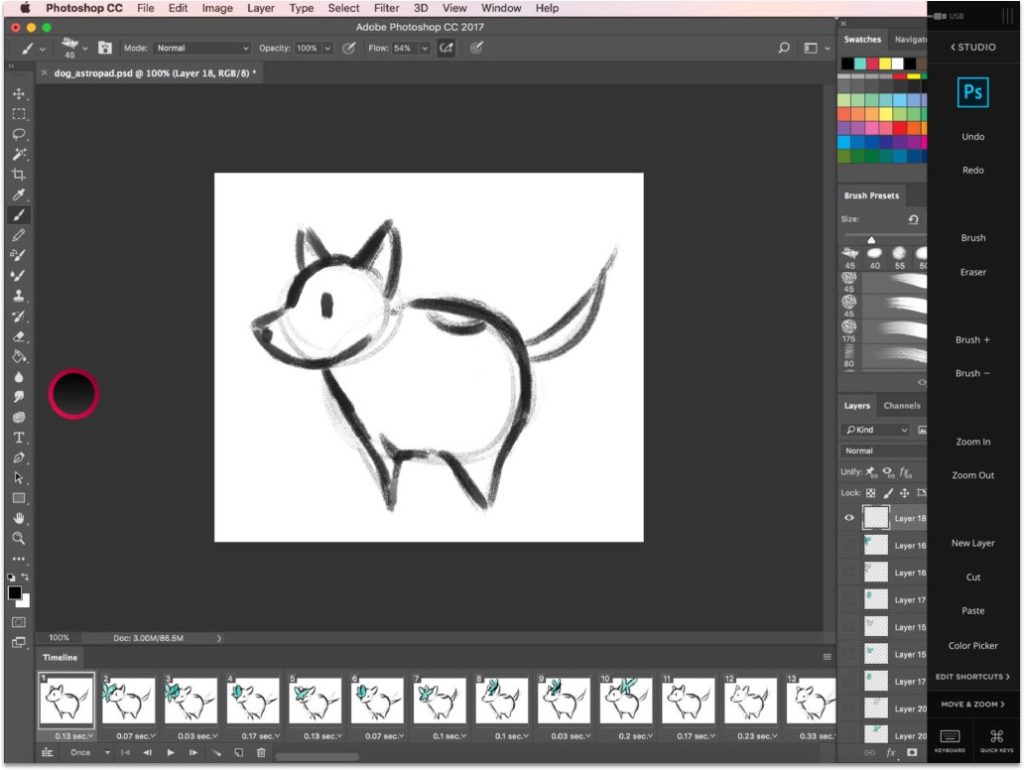
To turn the file into an animation, open Timeline. However, instead of using the Video Timeline, select Create Frame Animation.
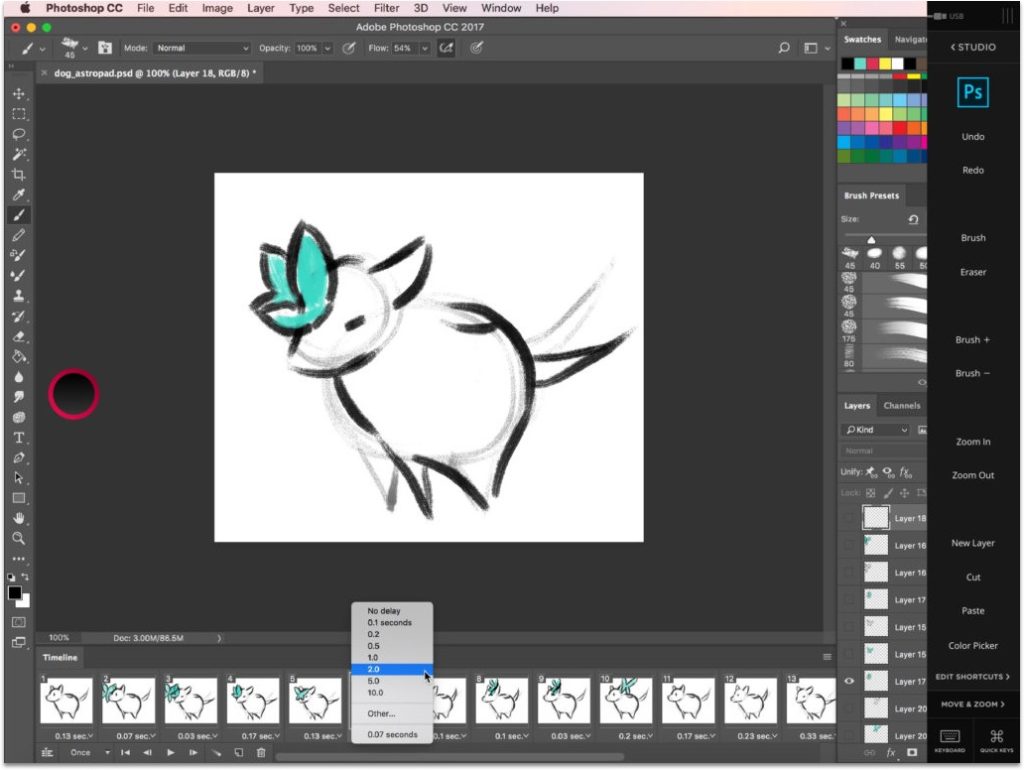
Frame Animation lines up your images in sequential order. It also helps organize and visualize your sequence frame-by-frame. Each frame is shown, along with its respective duration. To edit the timing, click directly on the timestamp below the frame.
Use Tween to make smooth GIF transitions
To create an animated GIF in Photoshop without the Onion Skin option, you can use Tween. Tween is short for “inbetweening,” and it allows you to make smooth transitions between each frame.
Tween displays an underlay of the previous image in your sequence, and you can adjust the opacity to show how the frames enter and exit the sequence. This gives a better idea of the frame transition by the second, not just between the images.
How to create an animated GIF in Photoshop from a video file
If you are using a video file in Photoshop, there are different ways to make an animated GIF in Photoshop:
- Go to File.
- Select Import and Video Frames to Layers. This will separate the video frames into individual Photoshop layers.
- Depending on your project or preference, open Video Timeline or Frame Animation. To split each frame manually, open the file in Video Timeline.
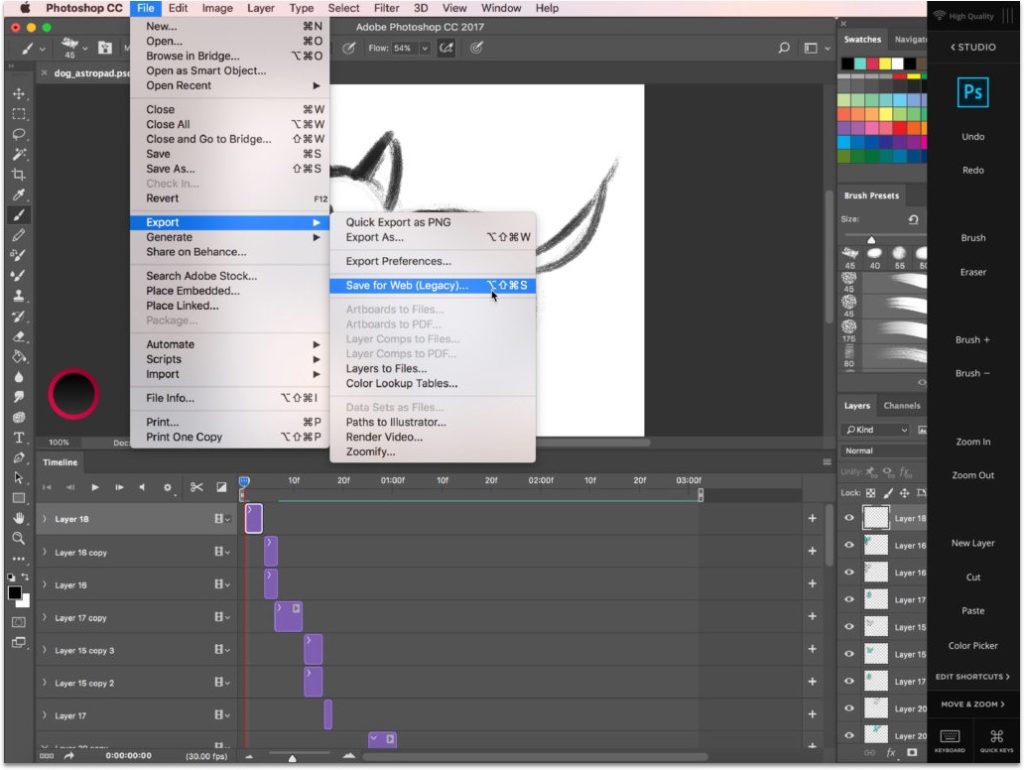
Save your Photoshop file as a GIF
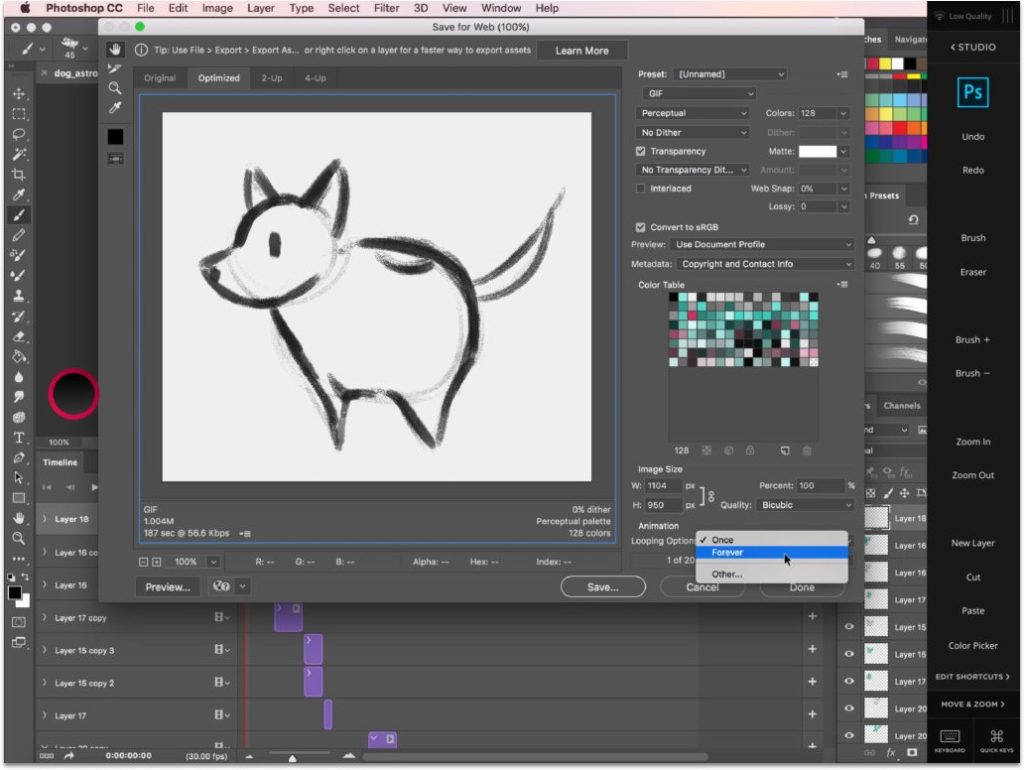
- Once your frames are ready, it’s time to save the file as a GIF. Go to File > Export Save for Web.
- A window will pop up with different options for color handling, image size, and more. These characteristics will need to be adjusted before the final save.
- If you want the GIF to be continuous, select Animation Looping Options and change to Forever.
- To preview your finalized GIF in the web browser, click Preview in the bottom left corner. When everything looks ready, click Save.
👉 Don’t forget to save your masterpiece! It’s important to save your work frequently throughout the process, so you don’t have to start from scratch again in case the program crashes!
Use the full desktop version of Photoshop on your iPad

Turn your iPad into a drawing tablet with Astropad Studio. Mirror any Mac or PC desktop app on your iPad, with full support for Apple Pencil and gestures.
- Mirror any desktop app on your iPad
- Build your own shortcut panel, custom gestures, and custom quick keys
- Utilize pressure-sensitive and precise sculpting and painting
- Connects wirelessly or over USB cable